
In today’s digital marketplace, a product’s first impression is often its last. Shoppers can’t touch, feel, or try items online — they rely entirely on visuals. That’s why product photography is one of the most crucial aspects of e-commerce success. Whether you’re a small business owner or a budding entrepreneur, mastering the art of product imagery can significantly boost conversions and customer trust.
This comprehensive product photography guide will walk you through proven techniques, equipment essentials, and budget-friendly strategies to help you capture high-quality product photos, even with a smartphone. From lighting to backgrounds and editing, here’s everything you need to know.
Why Product Photography Matters in E-Commerce
E-commerce product photography is more than just taking pretty pictures—it directly impacts your sales. According to a study by MDG Advertising, 67% of consumers consider image quality “very important” when making a purchase online. High-quality images build credibility, highlight product details, and help consumers make informed decisions.
If you’re selling on platforms like Amazon, Etsy, Shopify, or eBay, excellent photos are not optional—they’re essential.
Essential Product Photography Equipment
You don’t need a studio filled with expensive gear to take stunning product shots. Here’s what you need to get started:
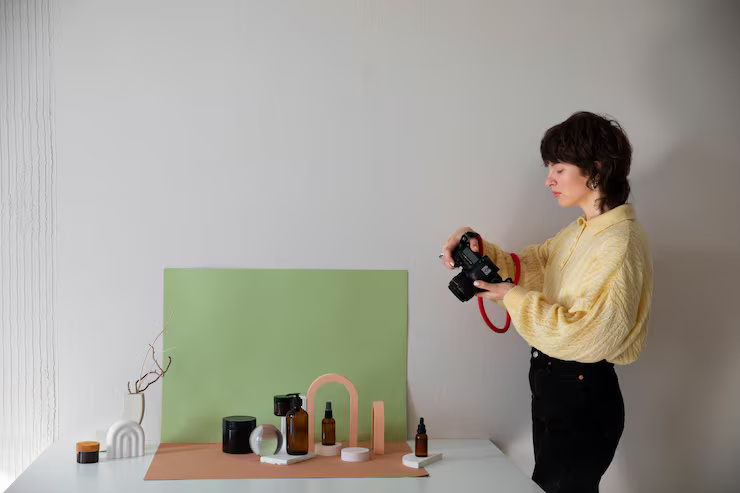
1. Camera or Smartphone
- DSLR or Mirrorless Camera: Ideal for advanced users who want full manual control and high resolution.
- Smartphone Product Photography: Modern smartphones like the iPhone 14 or Samsung Galaxy S22 come with powerful cameras capable of professional-grade results.
Pro Tip: Use your smartphone’s manual or Pro Mode to adjust ISO, shutter speed, and white balance.
2. Tripod
A tripod stabilizes your camera, eliminating blur and ensuring consistent angles. For smartphones, use a tripod with a mobile clamp.
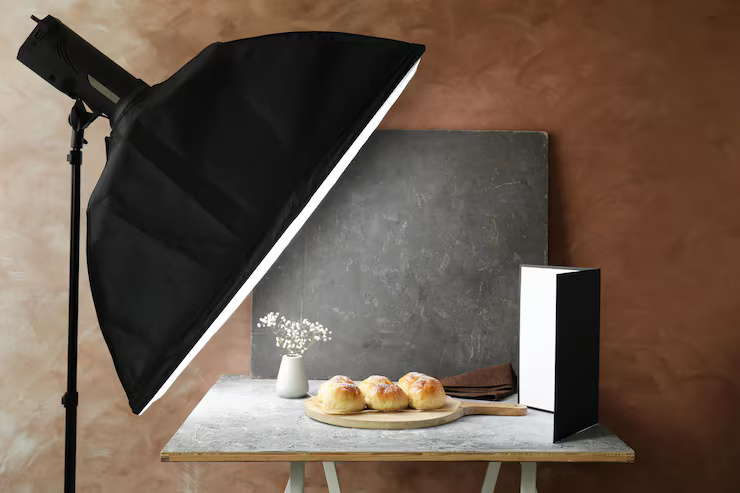
3. Lighting Setup
Lighting is the foundation of product photography. A good product photography lighting setup brings out texture, shape, and color accurately.
- Natural Light: Great for beginners. Shoot near a large window during daytime hours.
- Artificial Light: Use softboxes, LED ring lights, or continuous lights for full control.
- Light Tent: Perfect for small items, a light tent diffuses light to eliminate harsh shadows.
Recommended Read: How to Build a DIY Light Box
4. Backgrounds
A clean, distraction-free background ensures the product is the focal point.
- White Background Product Photography: Standard for Amazon listings. You can use white foam boards, paper rolls, or sweep-style backdrops.
- Creative Backgrounds: Wooden textures, fabric, or colored backdrops add aesthetic value for lifestyle shots.
5. Reflectors and Diffusers
- Reflectors bounce light onto shadow areas.
- Diffusers soften harsh light to reduce glare and overexposure.
Product Photography Setup: Getting It Right
Creating an effective product photography setup involves more than just placing your product on a table. Here’s a step-by-step breakdown:
Step 1: Choose a Location
Select a well-lit space. Natural light works best near windows, but avoid direct sunlight which can cause harsh shadows.
Step 2: Set Up Your Background
Use clamps or tape to hold your background in place. Ensure it’s wrinkle-free and wide enough for your product.
Step 3: Arrange the Lighting
Use a three-point lighting setup:
- Key Light: Main source of light.
- Fill Light: Fills in shadows.
- Back Light: Separates the product from the background.
Step 4: Position the Camera
Mount your camera or smartphone on a tripod. Shoot from multiple angles—front, top, 45-degree, and close-up shots.
How to Take Product Photos with Phone
Many small businesses opt for DIY product photography using their phone. With the right technique, you can achieve professional results.
Tips for Smartphone Product Photography:
- Clean the Lens before each shoot.
- Use Gridlines to follow the rule of thirds.
- Avoid Zooming In, as it reduces image quality. Move closer instead.
- Use Natural Light and turn off your phone’s flash.
- Shoot in HDR Mode for balanced exposure.
Apps like Snapseed, Adobe Lightroom Mobile, and VSCO allow for post-processing directly on your device.
Best Lighting Setup for Product Photography
Lighting determines how your product is perceived. Here’s a quick comparison:
| Lighting Type | Pros | Cons |
|---|---|---|
| Natural Light | Free, soft, and flattering | Limited control, weather dependent |
| Continuous Light | Adjustable, real-time feedback | Requires initial investment |
| Flash Lighting | High output, professional quality | Complex setup, not beginner-friendly |
For most online sellers, a simple two-softbox lighting setup is ideal. Position one at a 45-degree angle and another as a fill or background light.
Product Photography Tips for Small Business Owners
Running an online shop doesn’t mean you need a professional studio. Here are actionable tips:
- Consistency is Key: Maintain uniform lighting, background, and angles across all images.
- Focus on Product Features: Highlight textures, zippers, labels, or unique elements.
- Use Props Wisely: Add context but don’t overshadow the product.
- Avoid Reflections: Especially for jewelry or glossy items—use diffused light and anti-reflective surfaces.
- Shoot in RAW (if available): Allows better editing flexibility.
DIY Product Photography Setup Under Budget
Want to keep costs low? Here’s how to create a complete setup under ₹2,500 INR (~$30):
- Backdrop Stand or DIY Using Clips – ₹500
- White Foam Boards or Chart Paper – ₹200
- Two LED Bulbs with Clamp Holders – ₹800
- Tripod for Phone – ₹500
- Reflector (or DIY using foil/cardboard) – ₹200
Affordable and effective, this DIY studio is perfect for beginners.
How to Do Product Photography for Amazon or E-commerce
Amazon has strict guidelines. Follow these for compliance:
Amazon Product Photography Requirements:
- White background (#FFFFFF)
- Product should occupy at least 85% of the frame
- No props, logos, or watermarks in main image
- Minimum 1000 px on longest side (ideal for zoom)
E-commerce platforms like Shopify, WooCommerce, and Etsy allow more flexibility—use lifestyle images in addition to studio shots.
Explore: Amazon Product Image Requirements
Creative Product Photography Ideas
Break the monotony of white background product photography with these ideas:
- Flat Lay Photography: Arrange items flat on a surface and shoot from above.
- Lifestyle Shots: Show products in real-world use. Ideal for clothing, gadgets, kitchenware, etc.
- Close-Up and Macro Shots: Highlight product details.
- Animated GIFs or 360-Degree Images: Provide a richer visual experience.
How to Edit Product Photos for E-Commerce
Even the best photos benefit from light editing.
Editing Workflow:
- Crop and Straighten: Align with platform dimensions.
- Adjust Brightness and Contrast: Enhance visibility.
- Correct White Balance: Ensure true color.
- Remove Background (if needed): Tools like Remove.bg and Canva Pro can help.
- Sharpen and Retouch: Emphasize details without overdoing it.
Try: Adobe Photoshop Express or Pixlr Editor
Tools Needed for Product Photography Studio
As you scale up, investing in better tools can streamline your workflow:
- DSLR with Macro Lens
- Strobe Lighting Kit
- Seamless Paper Backgrounds
- Tethering Software (e.g., Lightroom)
- Photo Editing Suite (Adobe Lightroom, Capture One)
Professional product photography services are also an option if budget allows, especially for high-ticket or high-volume products.
Step-by-Step Product Photography Tutorial for Beginners
- Plan Your Shoot: Decide background, style, and angles.
- Set Up Your Equipment: Lighting, tripod, and camera/smartphone.
- Stage the Product: Clean and place it properly.
- Take Multiple Shots: Vary the lighting and angles.
- Review and Select: Choose the best images.
- Edit and Resize: Optimize for web.
- Upload to Your Store: Use ALT text for SEO and compress images for faster loading.
Conclusion: Start Shooting Like a Pro
Great product photography doesn’t require a massive budget—it requires the right techniques, consistency, and attention to detail. With these product photography tips, even beginners can create compelling visuals that enhance brand credibility and increase conversions.
Whether you’re running a Shopify store, selling on Amazon, or managing your own e-commerce website, quality visuals are your best sales tool. Start with a DIY setup, upgrade as you grow, and never underestimate the power of a well-lit, sharply-focused photo.